3D Printing Name Tag - Using Prusa Slicer
Creating a dual-color 3D printed name tag using Prusa Slicer and learning about multi-color printing techniques.
3D Printing Name Tag - Using Prusa Slicer
How did I do this?
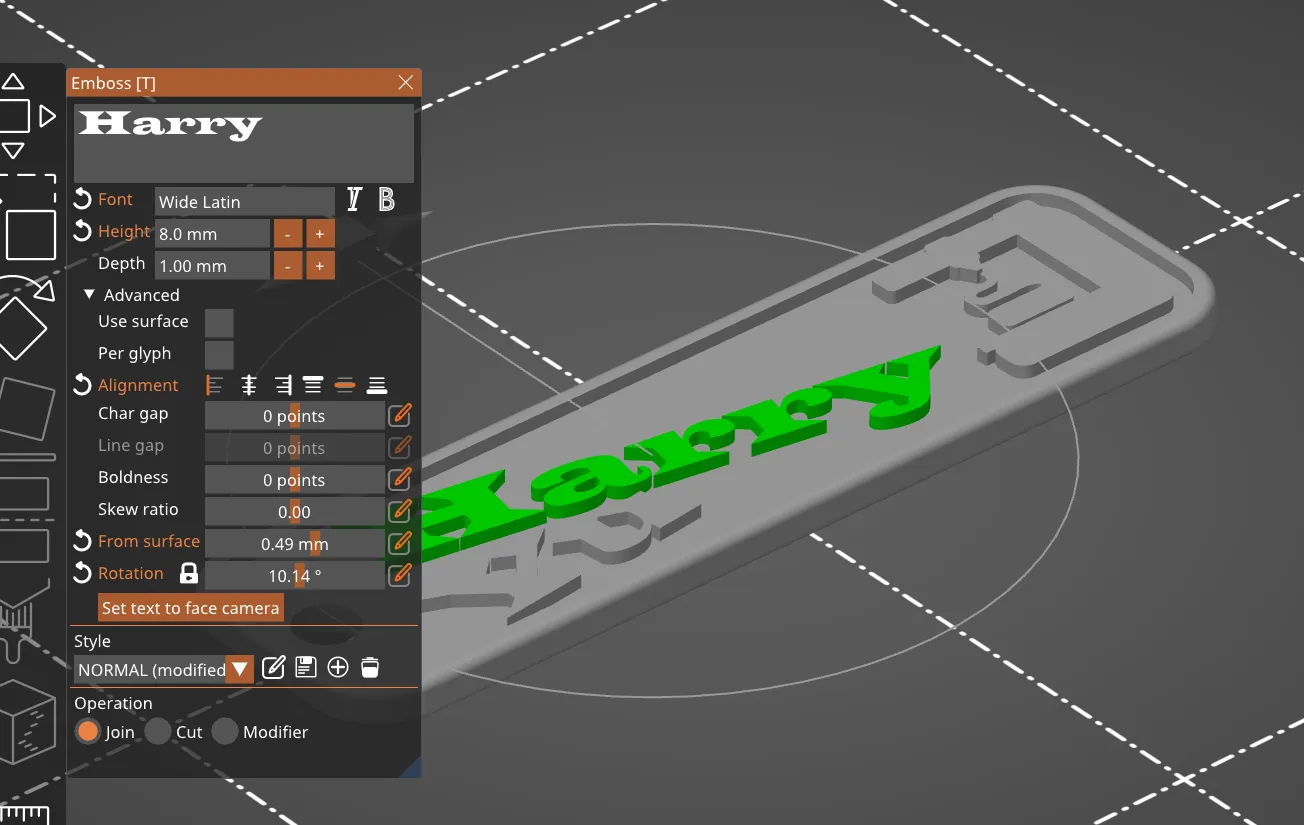
As a mission from a class, I was supposed to make a double color print of our name tags, so I decided to go for a green-on-white look. The process started with me designing the nametag, which I did in Prusa Slicer V2.7.1. Here's a screenshot of the process. You can see that I played with the font and rotations a bit:
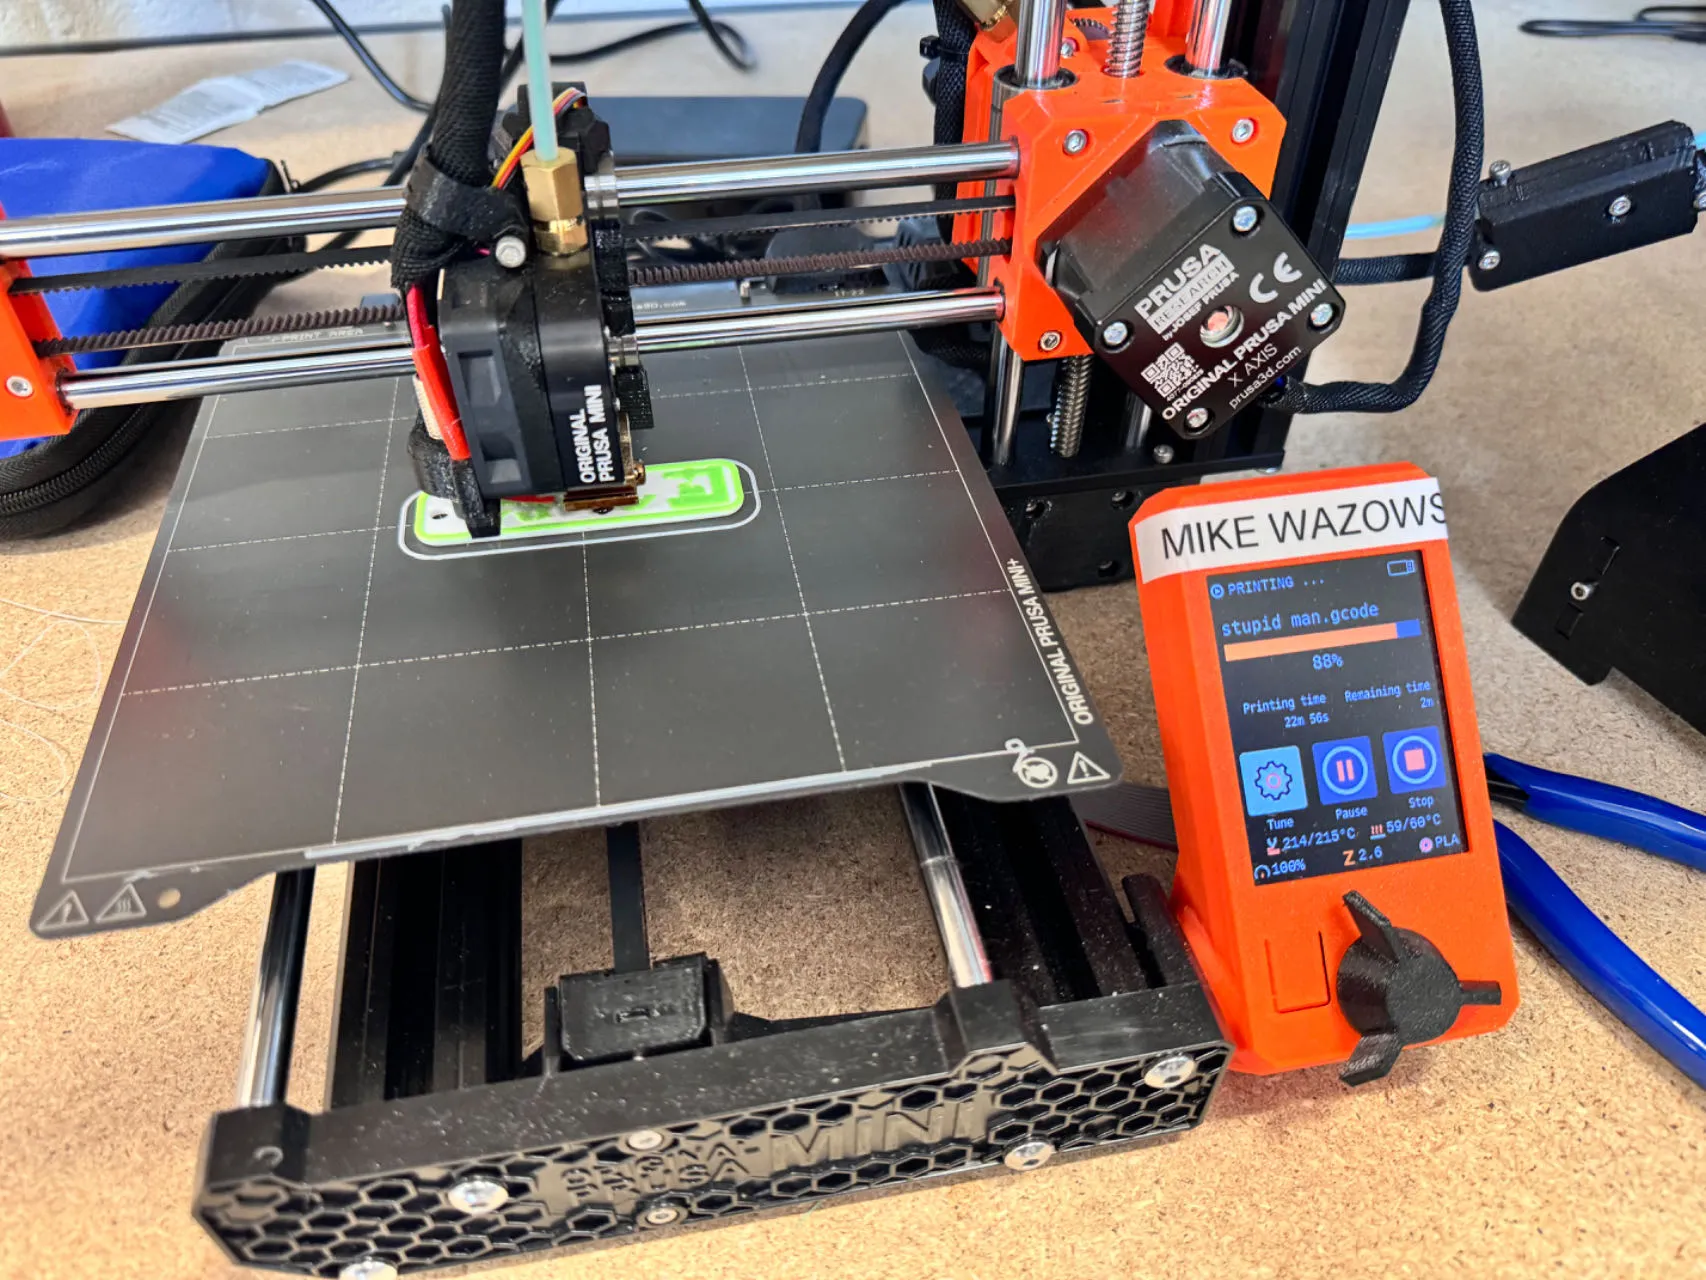
The settings I used were 60°C bed temp, 215°C nozzle temp, using PLA filaments, on a Prusa Mini. This model has built-in auto bed-leveling, and is a lot more beginner friendly than the old Ender-3's in the MakerLab last semester.
The Printing Process
Being a dual-color print, I was supposed to change the filament when the first bit has done printing. With a click of a button and the filament sensor being there, I simply pulled it out and fed the new filament through the tube, and that was it. After purging the old filaments, the process ended smoothly. Here's the name tag while it's printing:
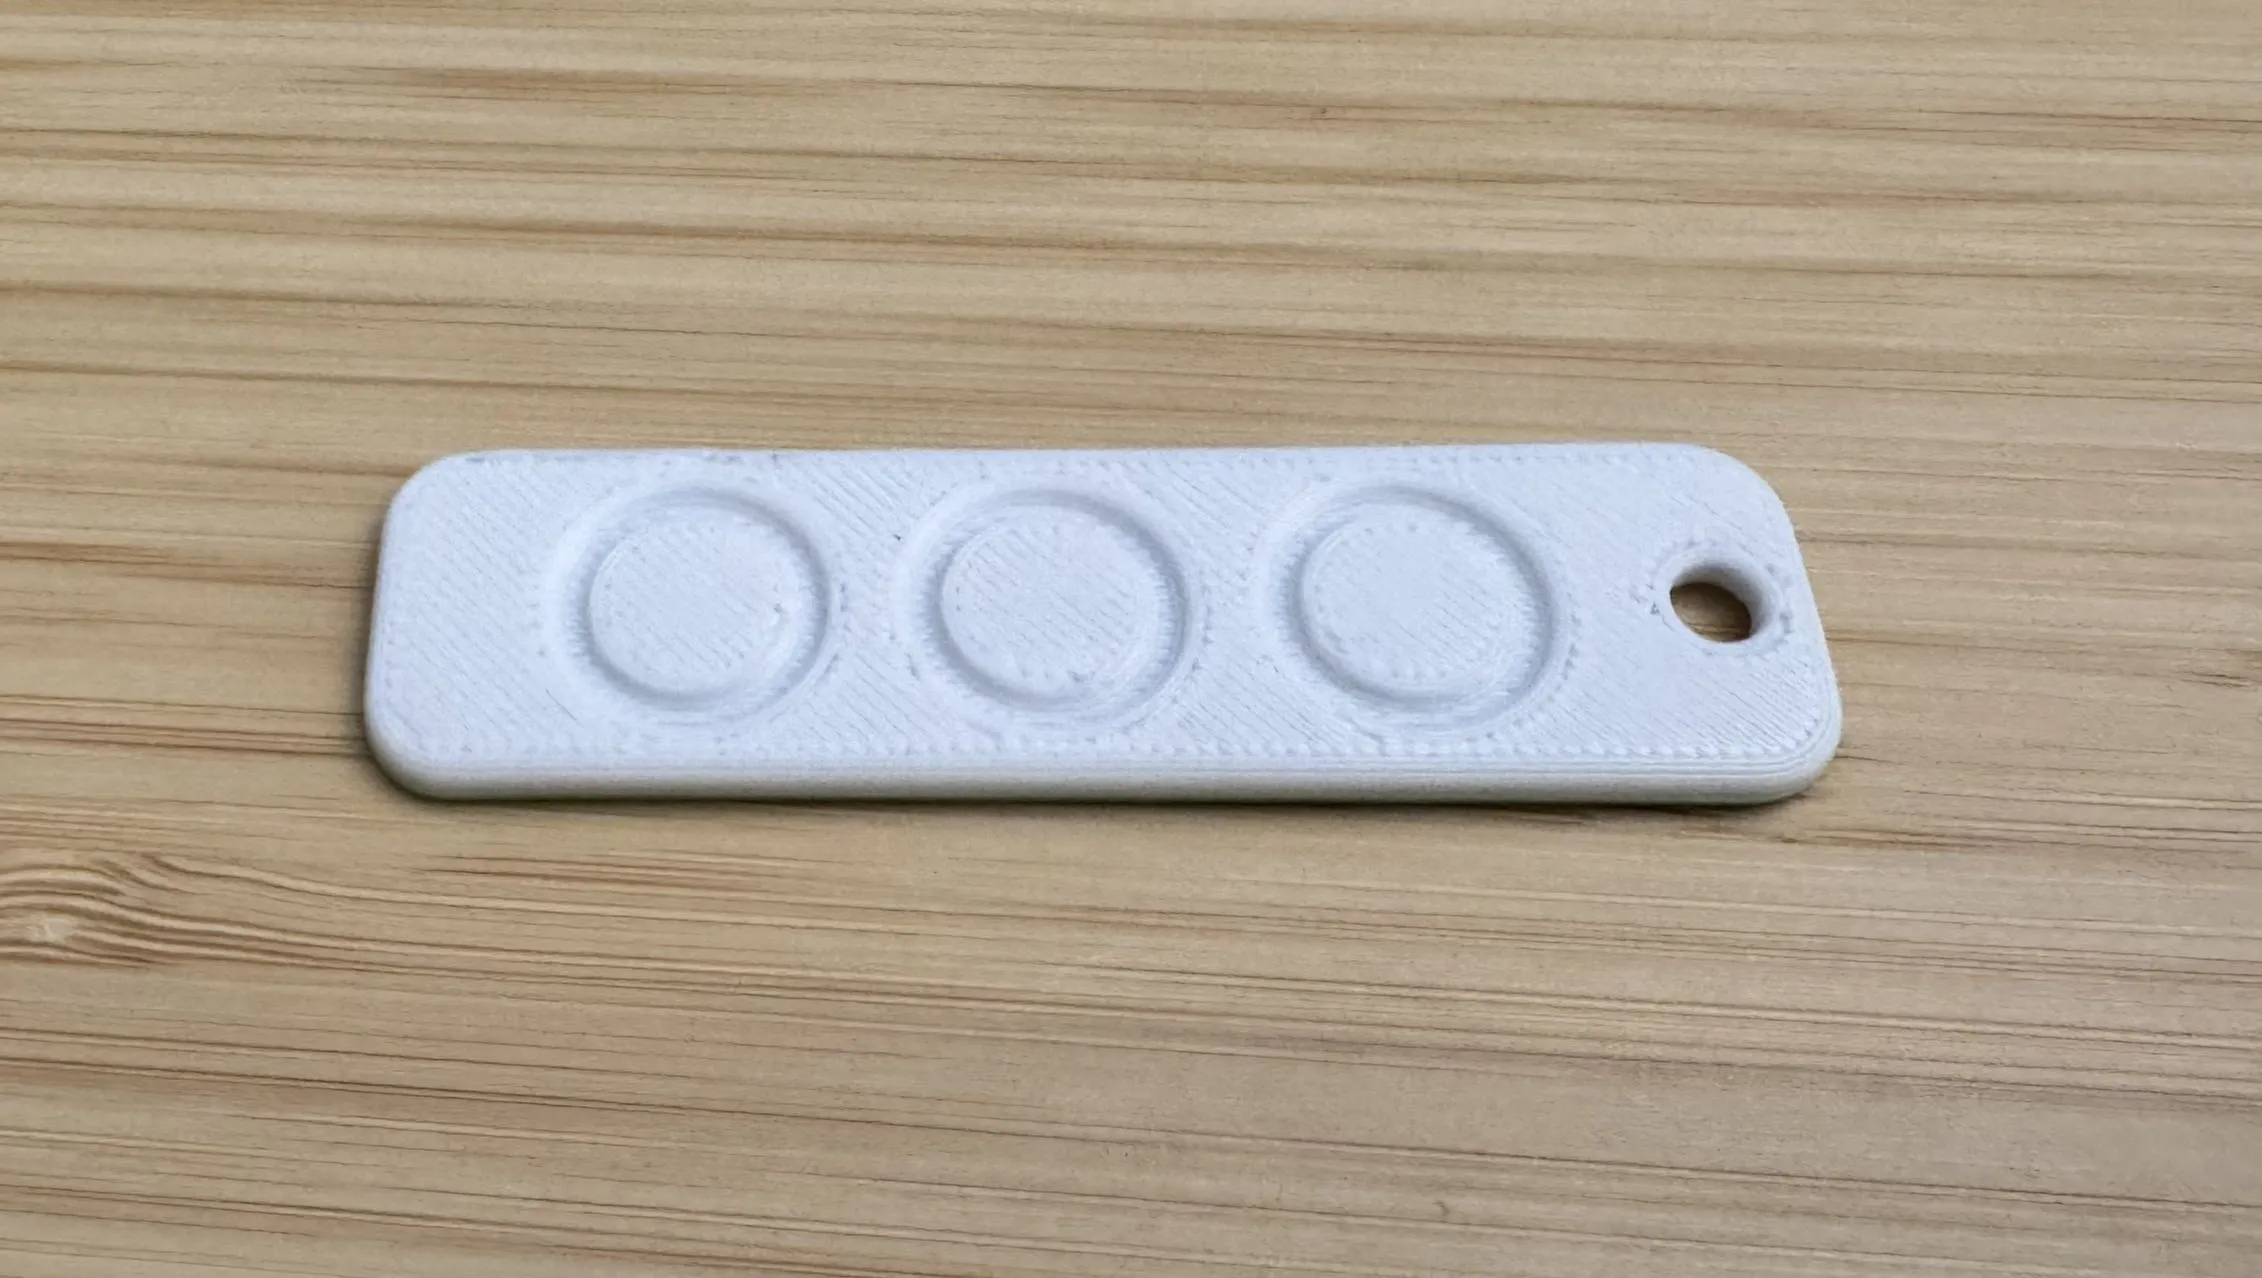
Final Result
This is the finished product. The picture quality is not great, but you can still see the texture that gives it the '3D-printed' look.

The dual-color printing technique opens up many possibilities for creating visually interesting prints without needing complex multi-extruder setups.