3D Modeling and Remixing using Fusion360
Learning Fusion360 by designing a custom headphone mount, dealing with measurement errors, and understanding layer adhesion in 3D printing.
3D Modeling and Remixing using Fusion360
How did I start?
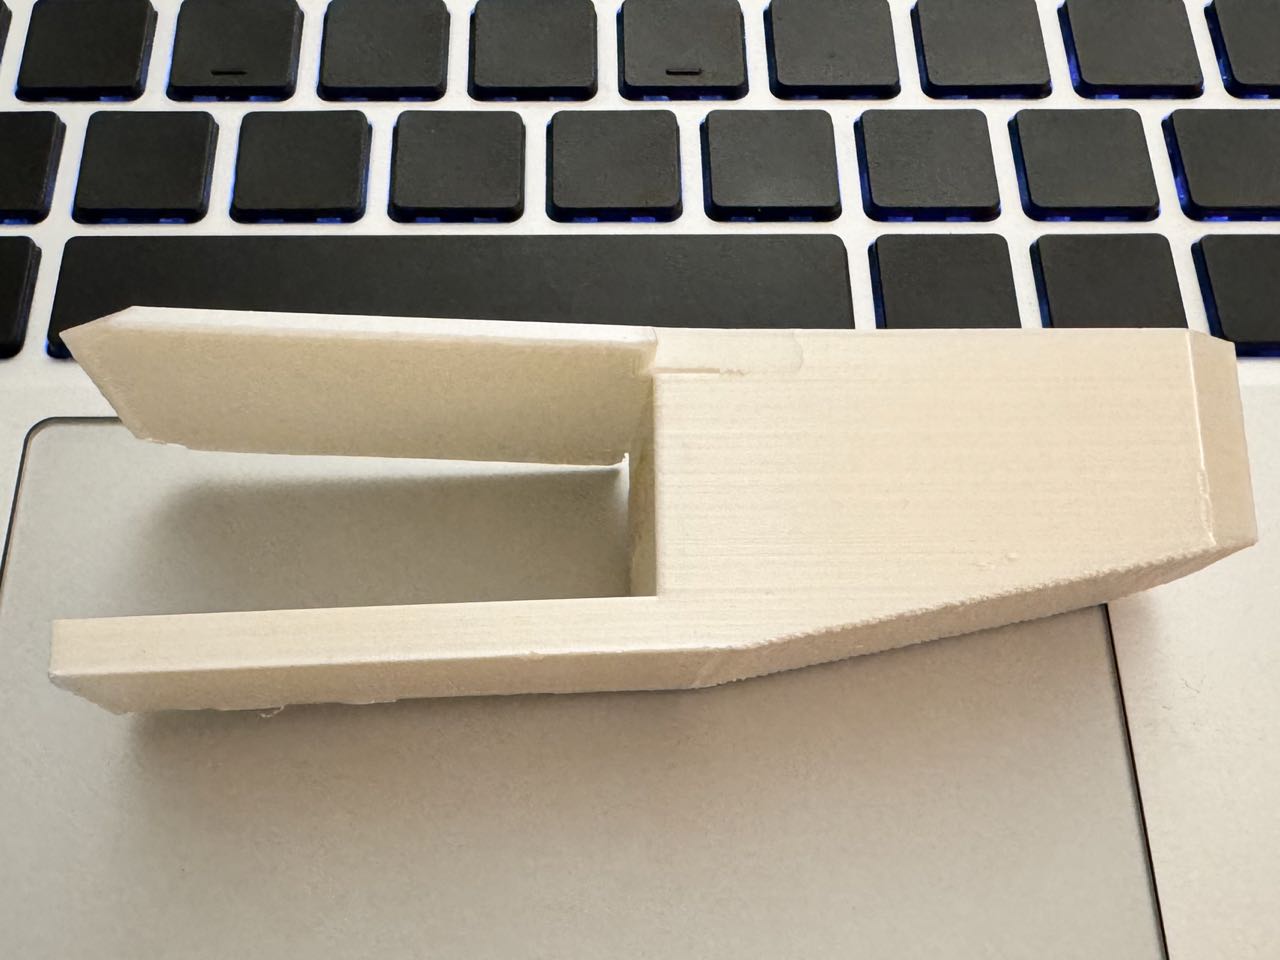
I first looked for a desk mount for a specific table thickness on Thingiverse, and in finding one, I downloaded it and imported it into TinkerCAD to tweak it. I changed the original holder to a hole, that suited a headphone holder that I already have, and imported it into PrusaSlicer to slice and print it. I didn't have a sketch for this design as the process was very simple, but I do have one for the second one. The final print turned out to have a gap slightly larger than I wanted:
First Attempt Results
 The hole here is for the soft headphone holder thing to plug in
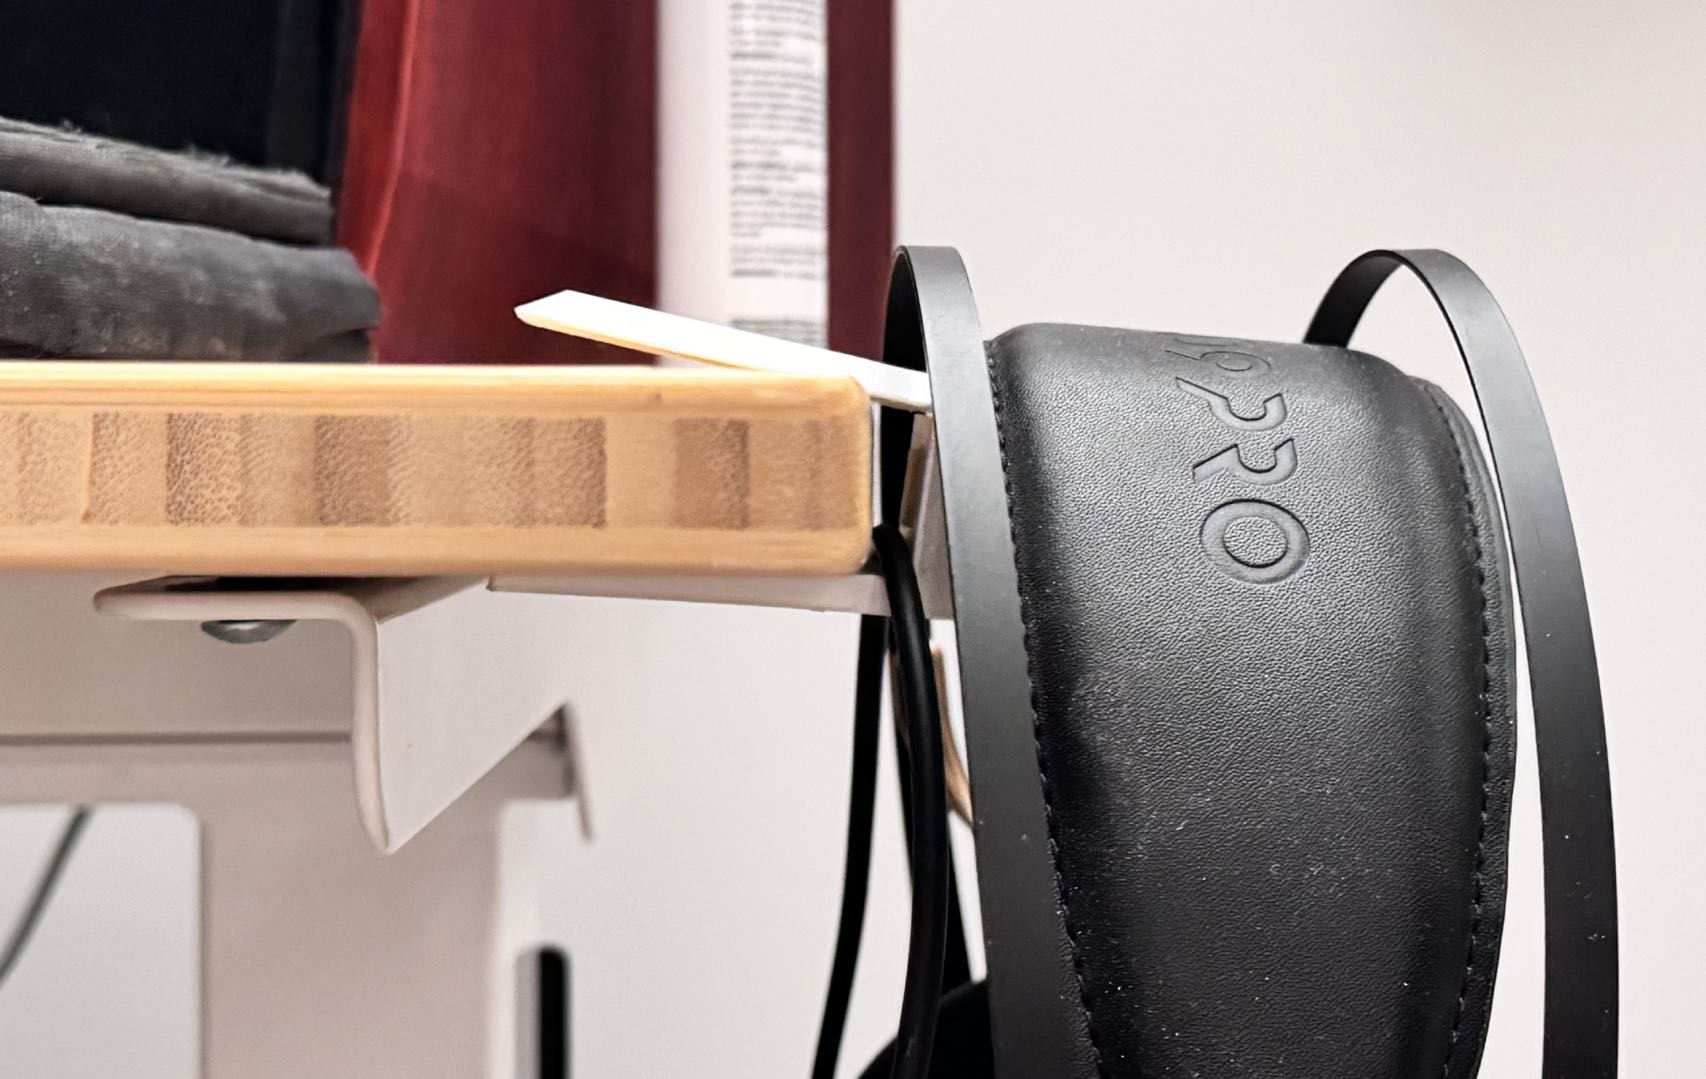
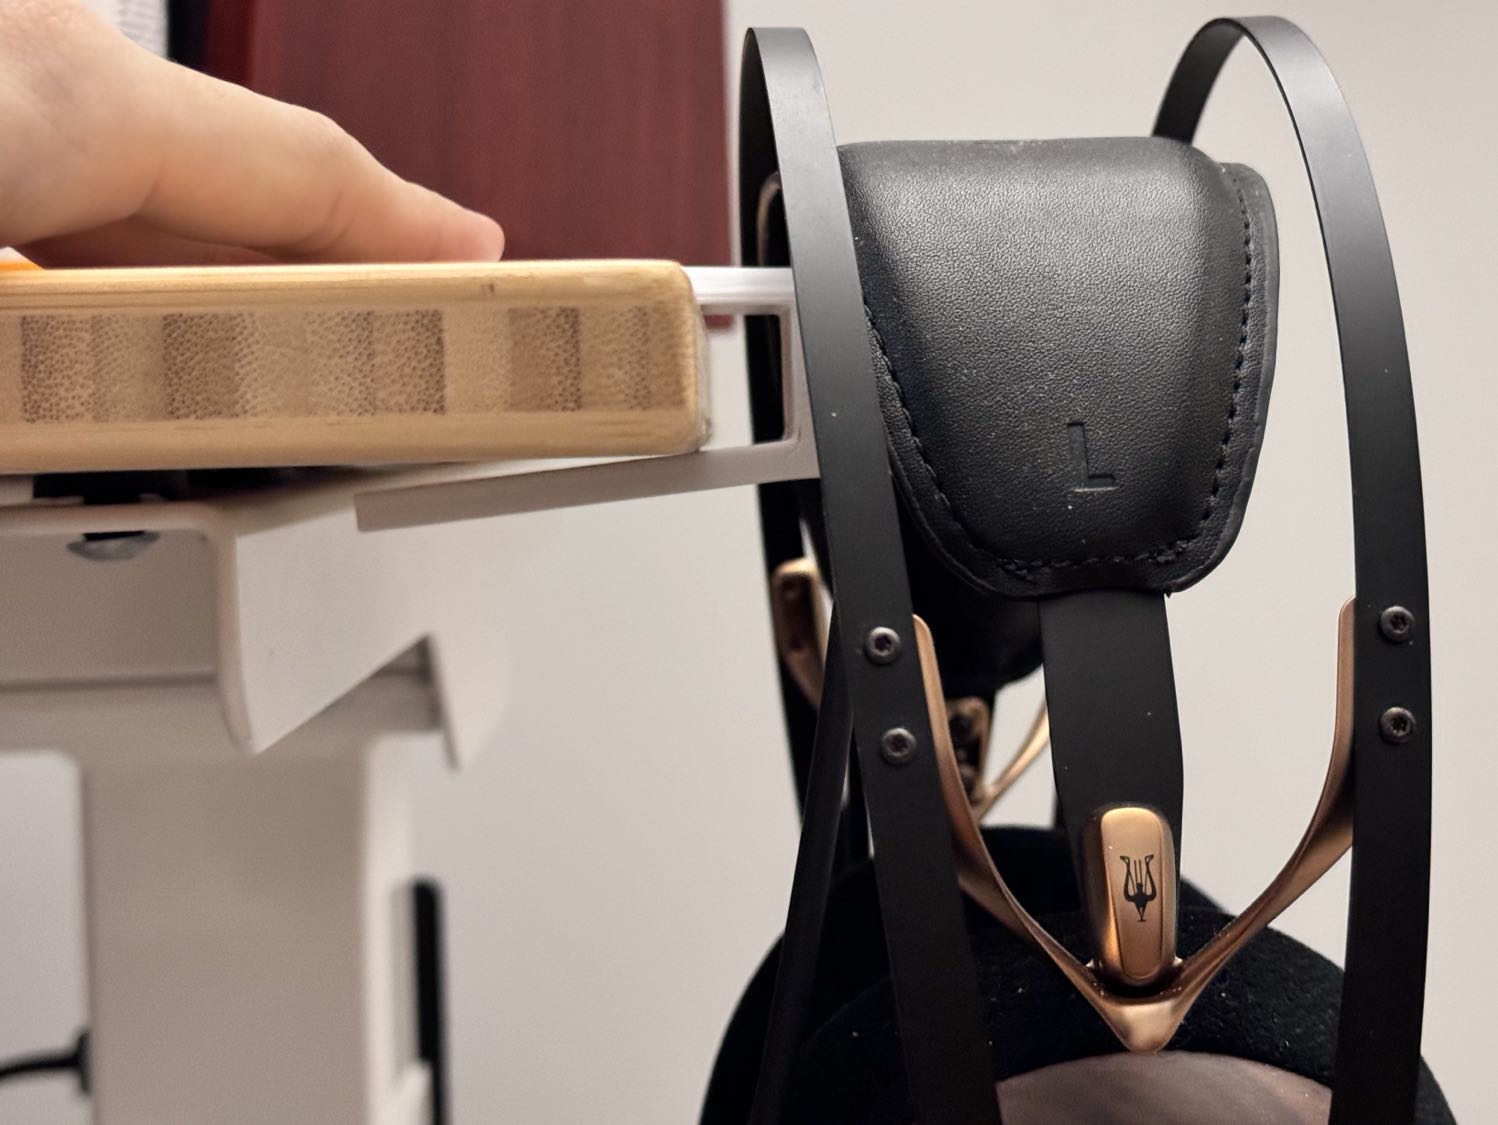
You can see that it did not fit on the table, and after some measurements, I got a better measurement for the table, this time 3mm shorter than the old measurement. This time, I thought that it would be such a tight fit that something like this will never happen again.
Learning About Layer Adhesion
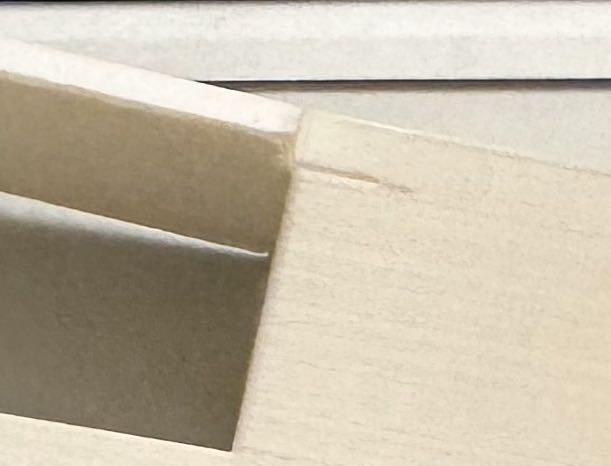
Although the print failed, I still learned a lot from this print. For example, for a 3D print like this, the direction on which it was printed mattered a lot. In this case, you can see the printed clamp crack after some use because the weight of the headphone is being used on the layer:
Designing in Fusion360
So I opened up Fusion360 and started designing my second print.
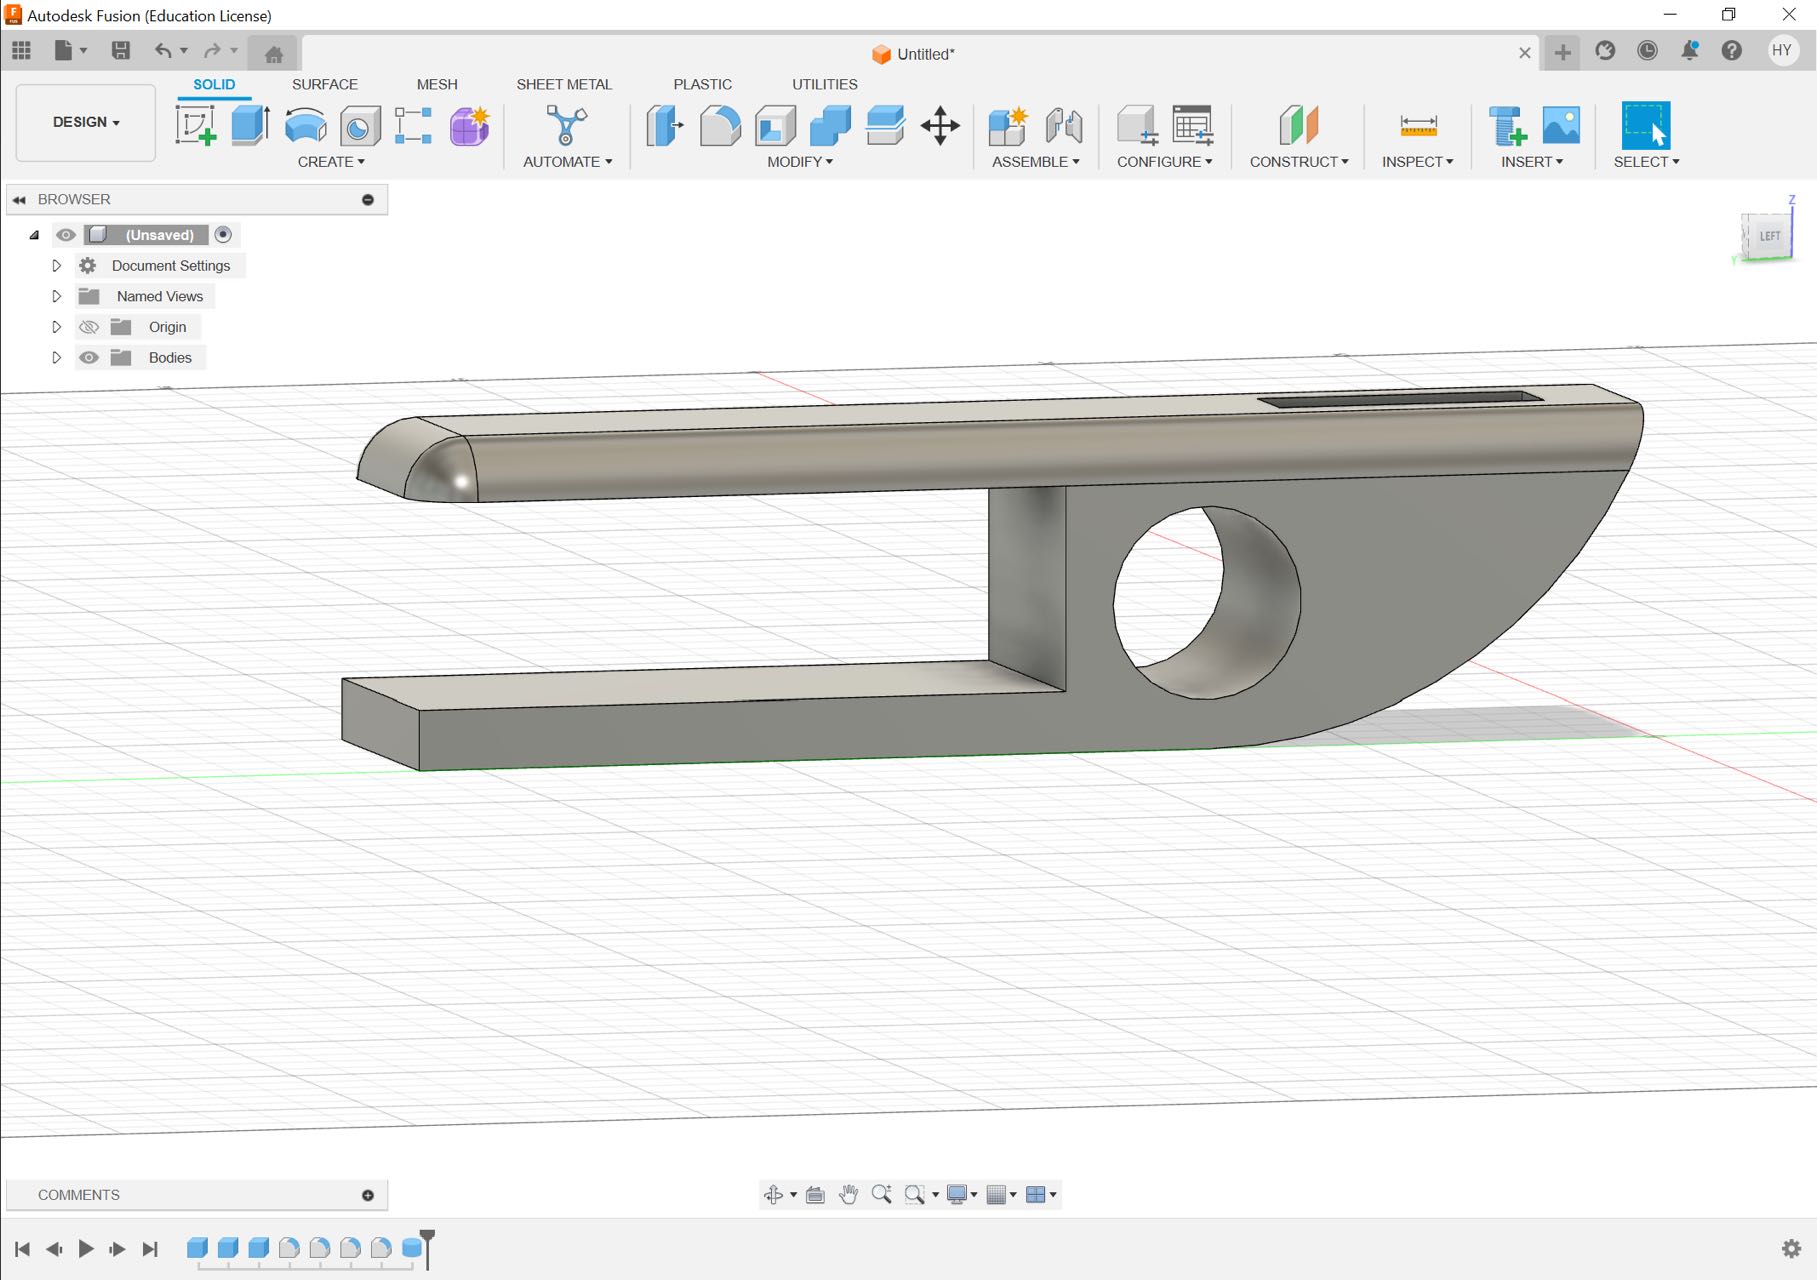
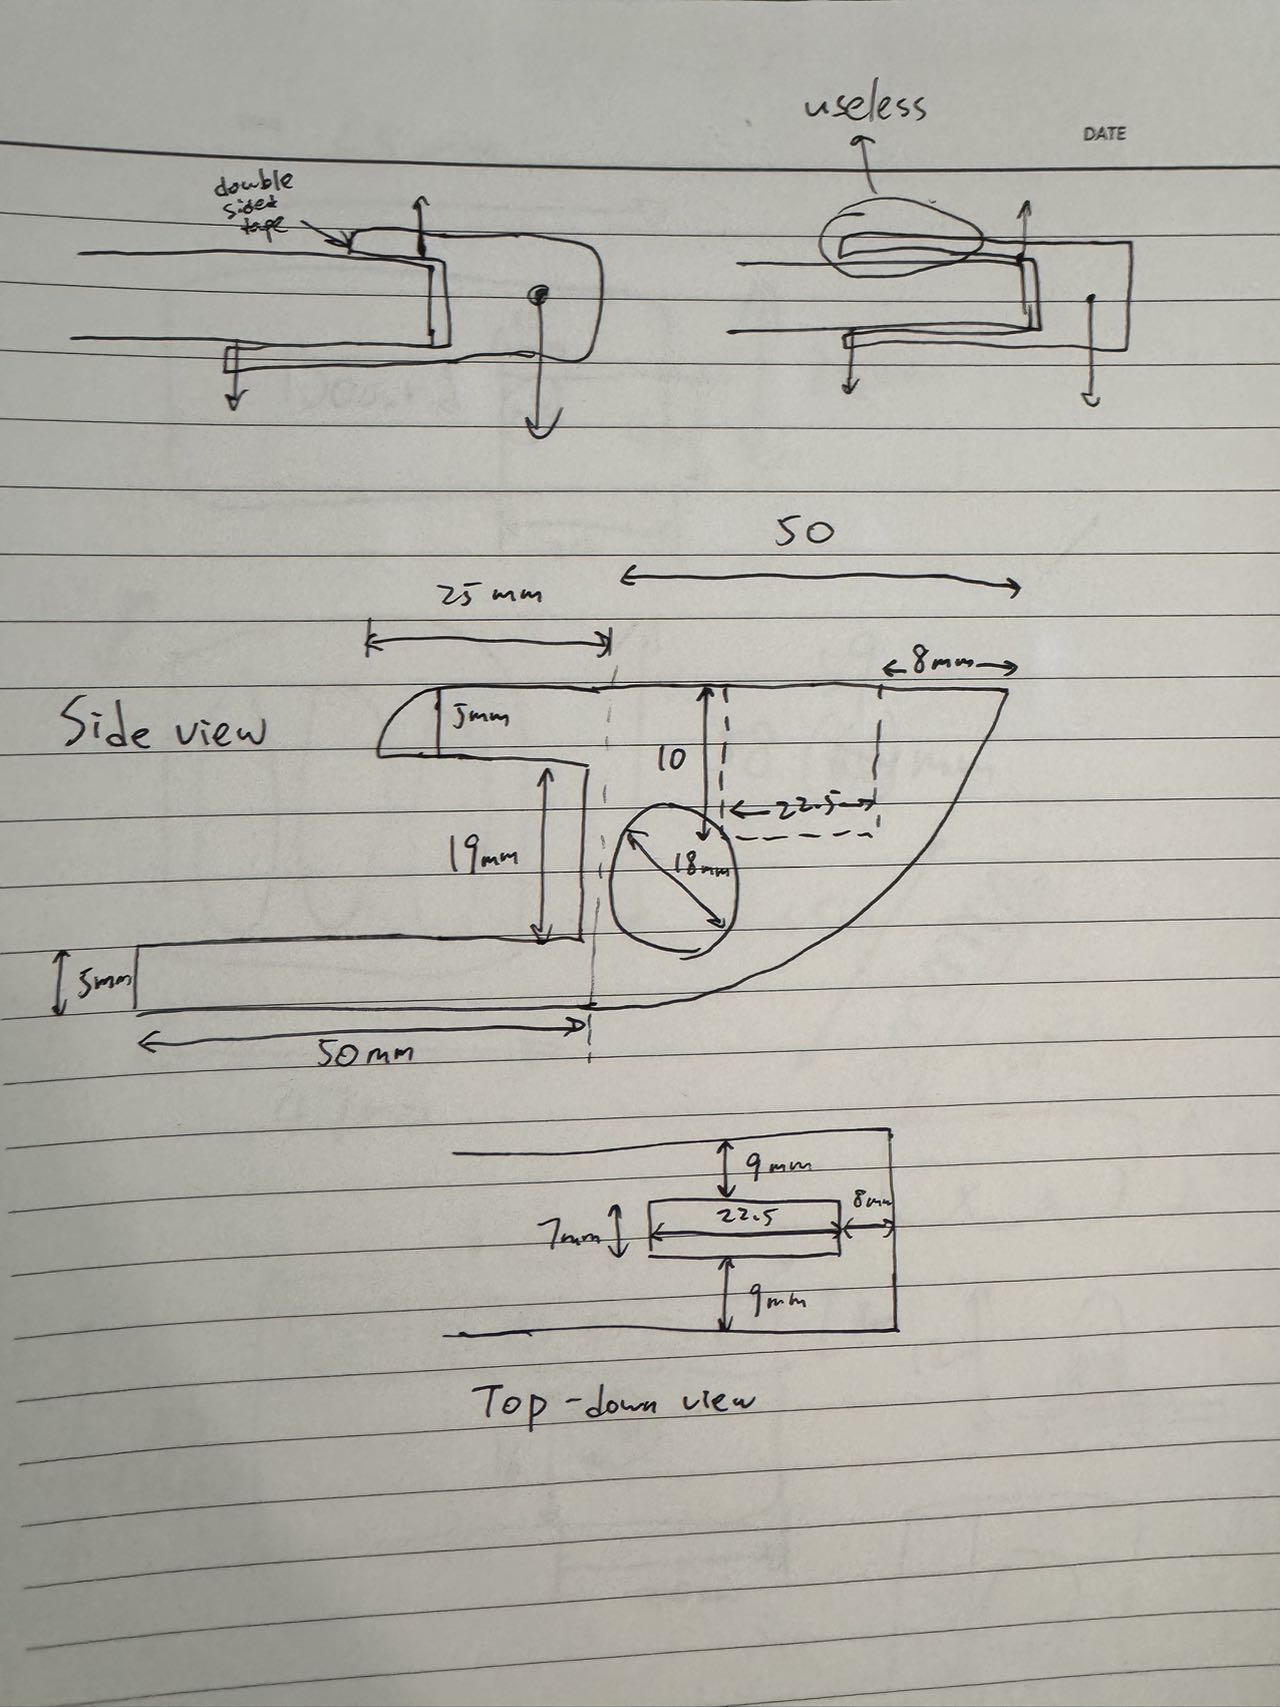
It was my first time using this software, so I had some questions about how it worked. I finally made my design by creating a block and putting other blocks onto it and subtracting them, which created the hole. I used the Fillet tool to create the curved surfaces which I think made the print a lot prettier, and saved materials compared to the last print.
I also made a hole for the cable to go through, solving another problem that bothered me when wearing headphones.
Design Process
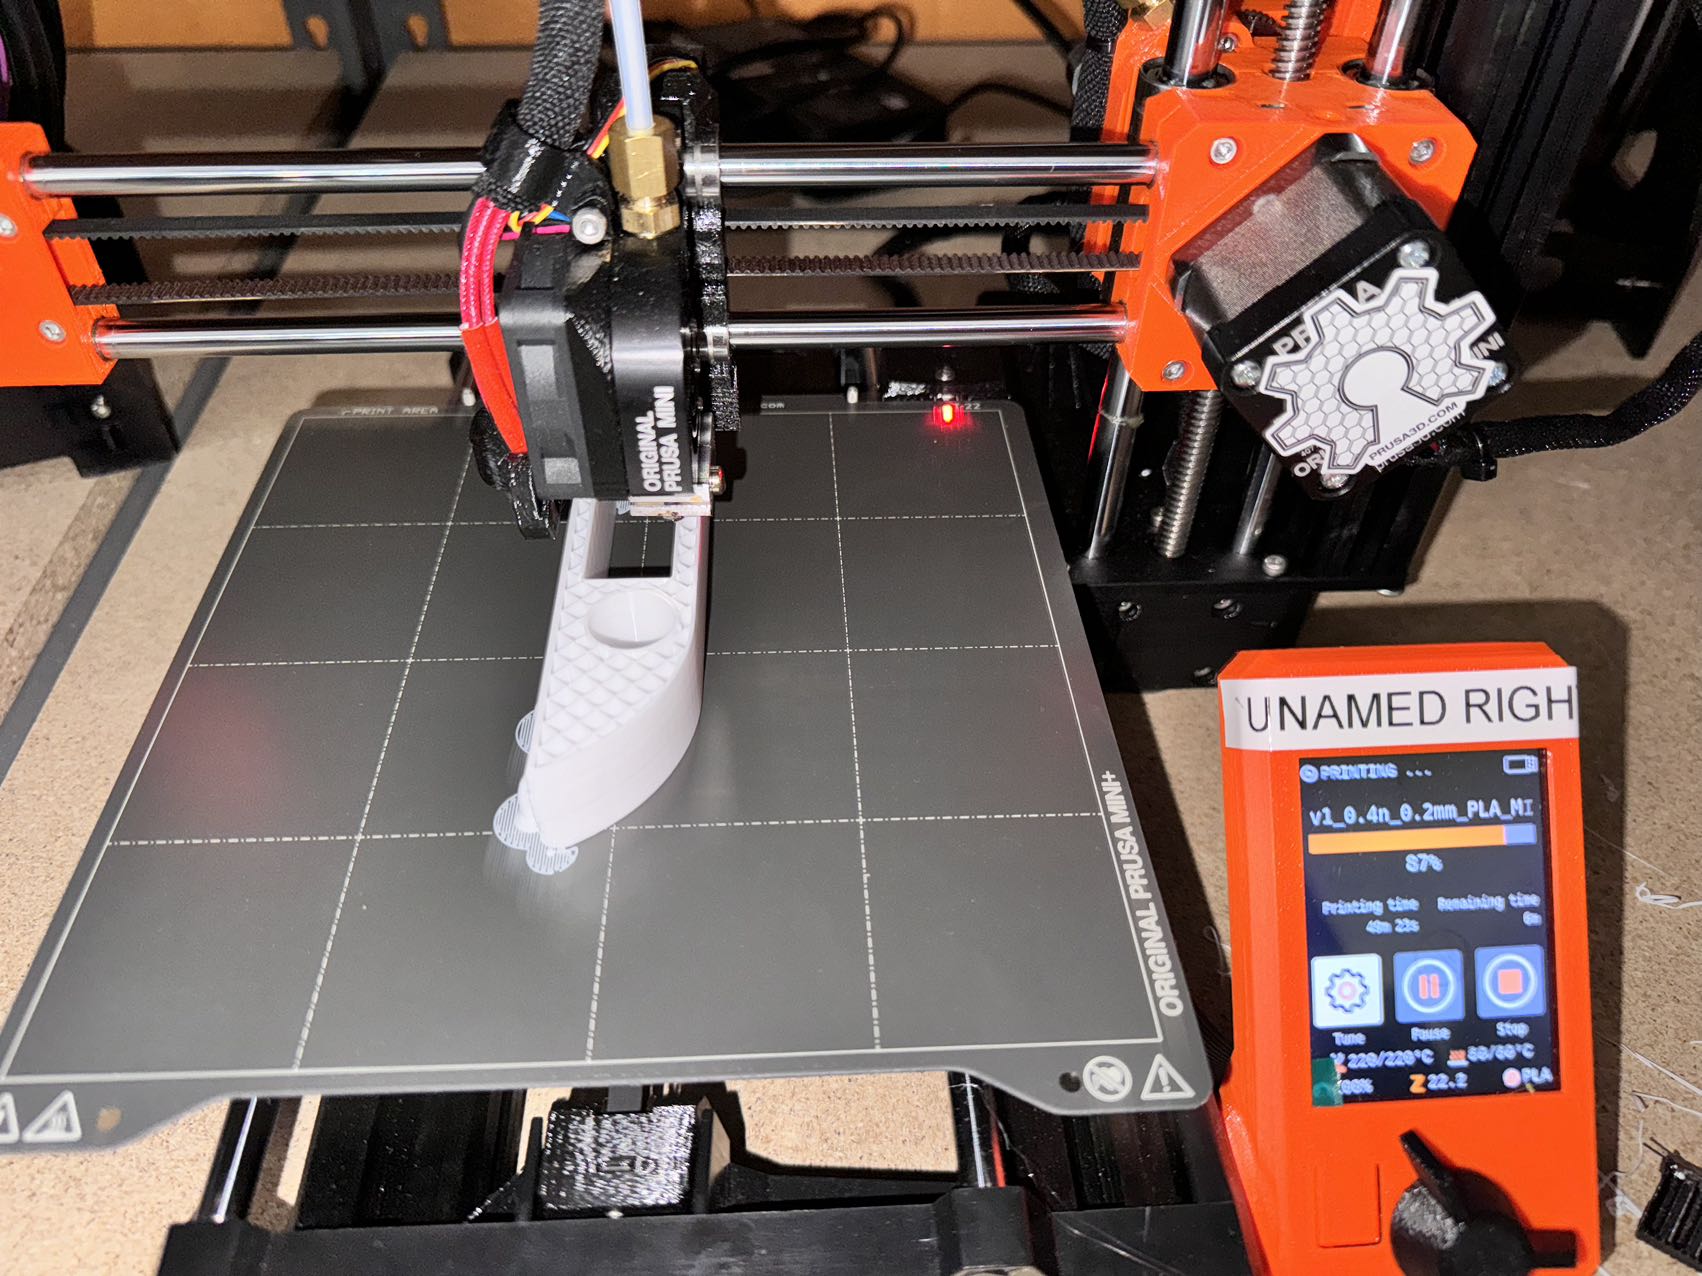
Here are some pictures in the process:
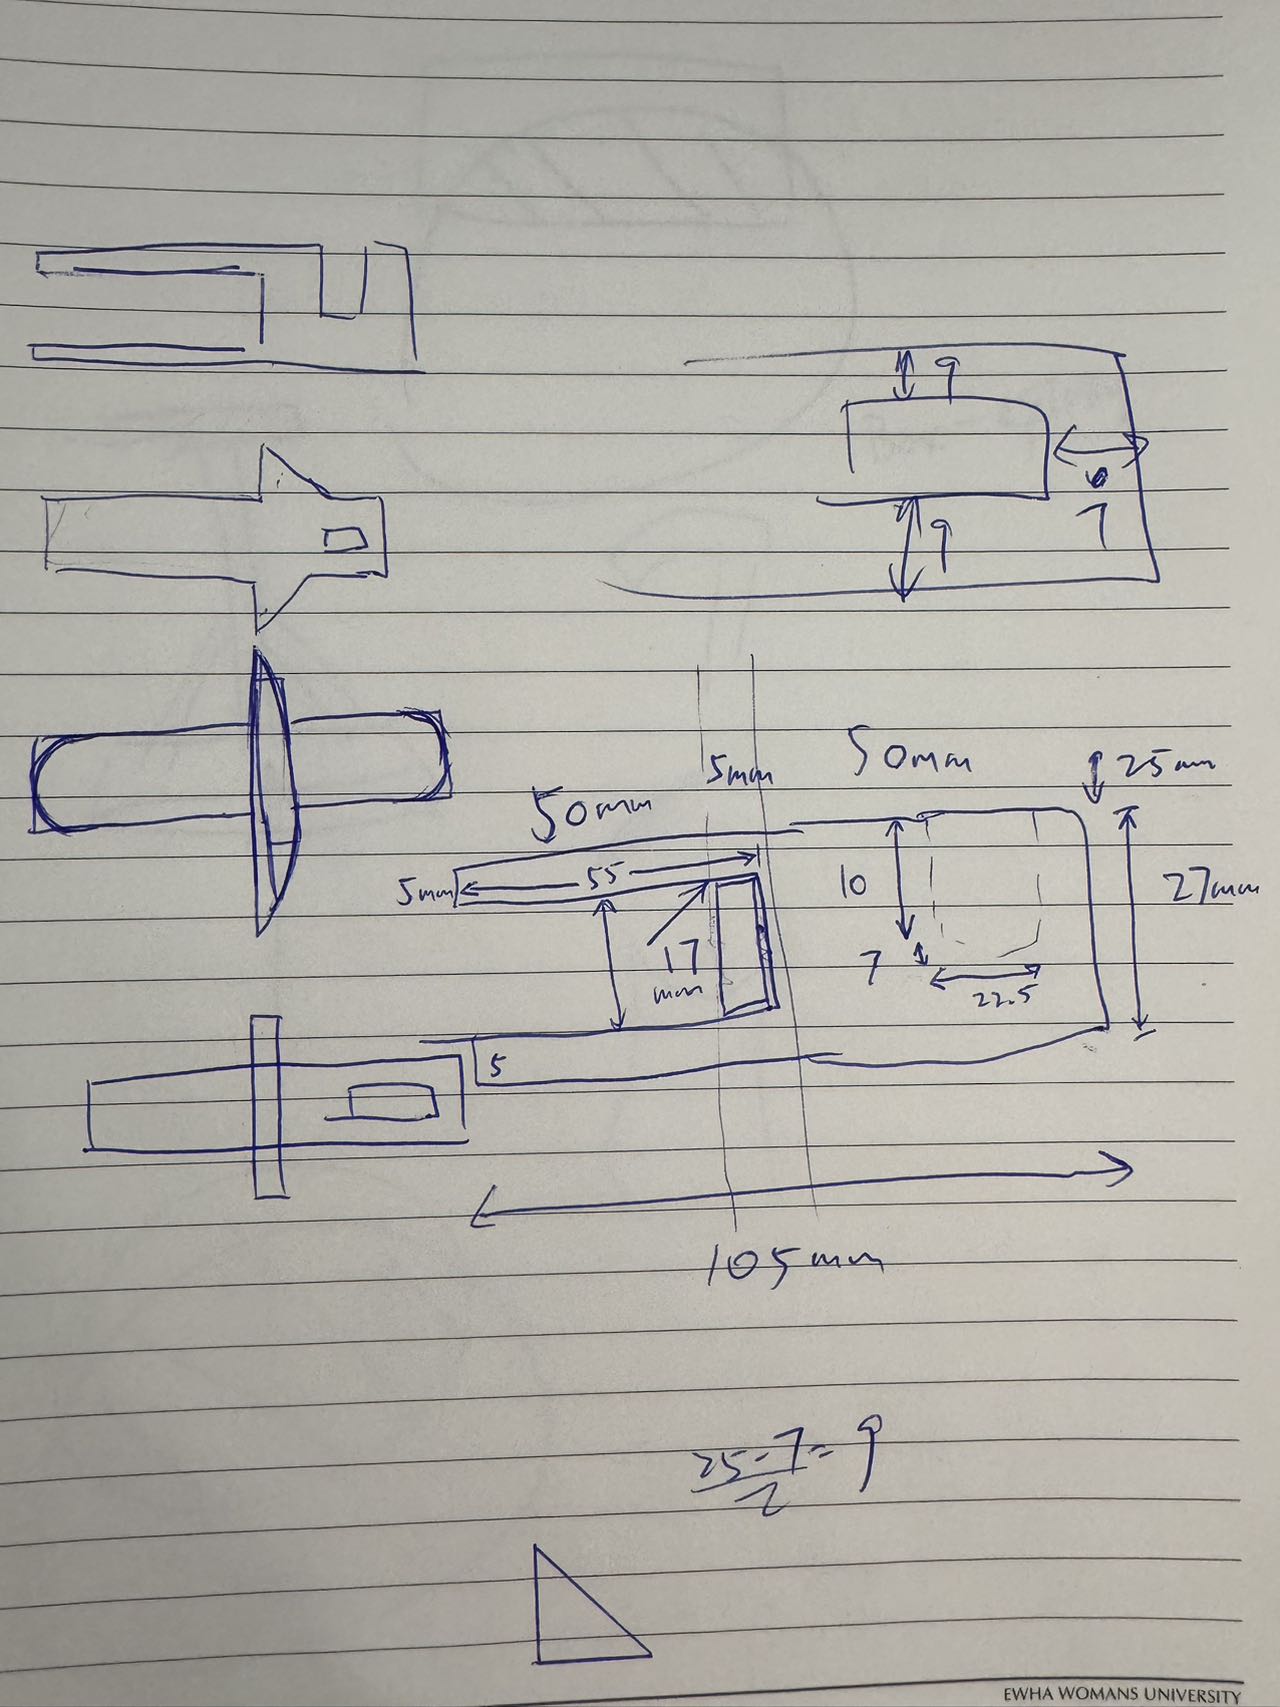
Sketches:
Print Failures and Learning
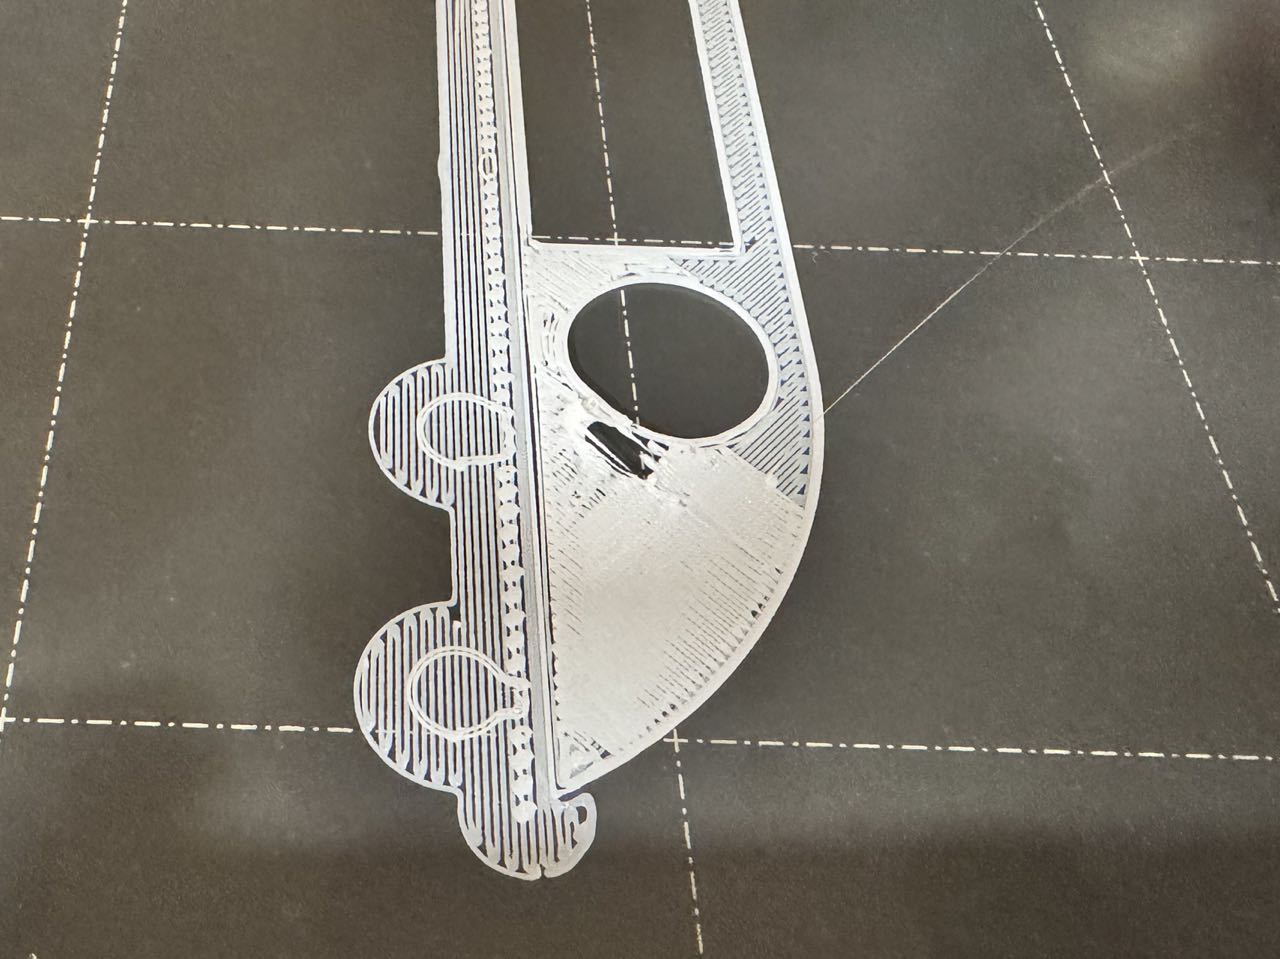
The print failed the first time, it had a big hole in it and I don't know what caused it. However, starting it over solved the problem.
Final Result
Here's the finished print:
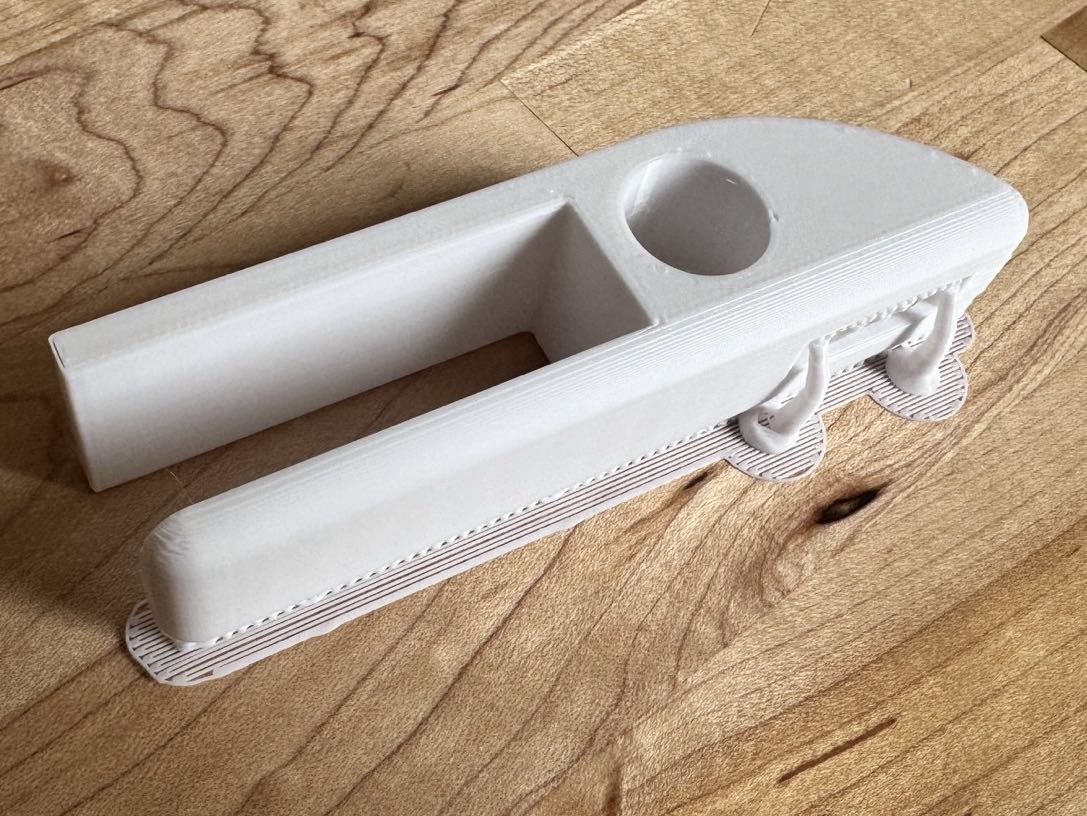
I took out the supports with a fork from the dining hall. When I put it on the desk however, I found it to be a bit narrow this time...
Continuous Improvement
I have ideas to improve it now I have the print finished, many of which popped into my head and quickly faded away. I should start documenting things when I think of them. Here's the new design:
This project taught me the importance of accurate measurements, proper print orientation for strength, and the iterative nature of design. Fusion360 proved to be much more capable than TinkerCAD for creating refined designs with proper curves and features.